Tech : How to load a roll of Labels into your Dymo LabelWriter
(Update 6/12/2019)
Following is an illustrated guide on loading labels into your Dymo LabelWriter Desktop Label Printer.
Please follow the steps listed below:
- Pull apart the spool.The part of the spool with the spindle should be in your left hand.
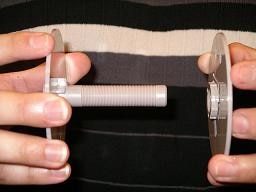
- With your right hand, pick up the roll of labels and place it near the spool
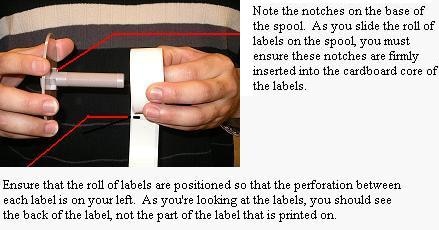
- Carefully slide the roll of labels on the spool.Push the roll of labels firmly on the spool so that the notches on the base of the spool enter the cardboard core of the labels.
- There should be no gap between the base of the spool and the roll of labels.
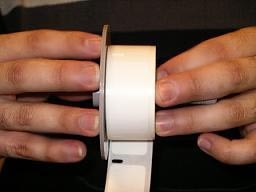
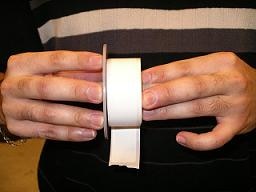
- With your right hand pick up the other piece of the spool. Carefully slide it down the spindle. As in step 3, ensure that the notches enter the cardboard core of the labels. The spool should be clamping down tightly on the roll of labels.

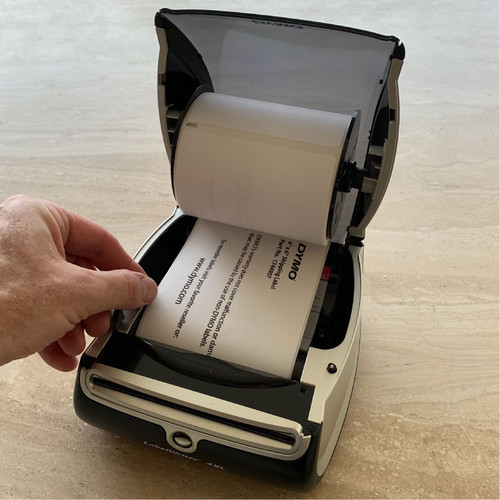
- Place the spool in the LabelWriter.
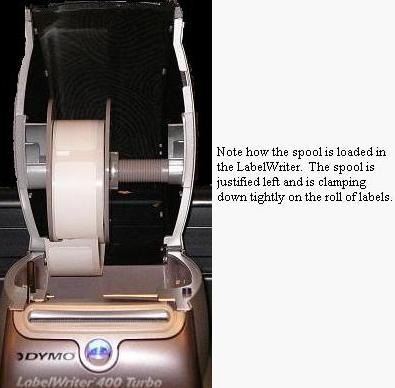
- Ensure the labels are justified left (when loooking at the LabelWriter from the front). Note the perforation between each label is on the left side and that the back of the label is facing upward. Any other configuration would indicate the labels are not loaded properly on the spool.
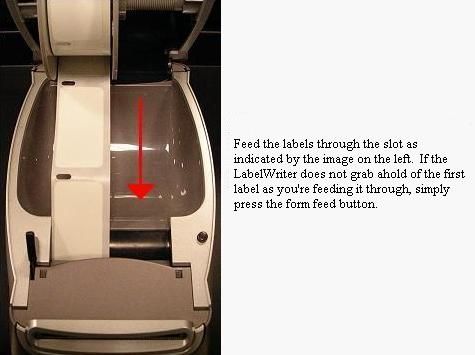
- The LabelWriter is ready for use once you've verified that the spool/labels are loaded properly and the LabelWriter form feeds one label at a time.
Labelcity stocks the entire range of Dymo LabelWriter labels, and we also manufacture a range of removable LabelWriter labels too.
Following is an illustrated guide on loading labels into your Dymo LabelWriter Desktop Label Printer.
Please follow the steps listed below:
- Pull apart the spool.The part of the spool with the spindle should be in your left hand.
- With your right hand, pick up the roll of labels and place it near the spool
- Carefully slide the roll of labels on the spool.Push the roll of labels firmly on the spool so that the notches on the base of the spool enter the cardboard core of the labels.
- There should be no gap between the base of the spool and the roll of labels.
- With your right hand pick up the other piece of the spool. Carefully slide it down the spindle. As in step 3, ensure that the notches enter the cardboard core of the labels. The spool should be clamping down tightly on the roll of labels.
- Place the spool in the LabelWriter.
- Ensure the labels are justified left (when loooking at the LabelWriter from the front). Note the perforation between each label is on the left side and that the back of the label is facing upward. Any other configuration would indicate the labels are not loaded properly on the spool.
- The LabelWriter is ready for use once you've verified that the spool/labels are loaded properly and the LabelWriter form feeds one label at a time.
Labelcity stocks the entire range of Dymo LabelWriter labels, and we also manufacture a range of removable LabelWriter labels too.